

Why useful
Shooting in the studio is more comfortable when you can save images directly on your computer and not on an SD card in the camera. It makes your workflow faster, as you can check image quality on a much bigger screen and you can post-process images on the go. No time-consuming transfer after the shoot is needed. In studio you can use either a cable to transfer the images or utilize the wireless tethered shooting mode
How to set-up wireless tethered shooting
Before you can shoot wireless into your computer you have to link your working computer, wireless network, and camera. Therefore you have to connect your camera with the provided cable to the computer and start OM Capture. This procedure is only needed the first time you are using your camera with the computer the first time. Once done no cable is needed. For linking computer, network and camera do following

1 Open OM Capture and press the plus close to “Create new link”
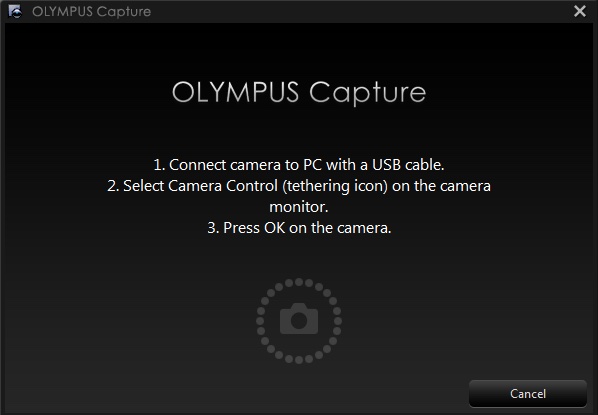
2 Connect your camera with your computer via cable and start. As soon the camera is started a selection menu shows up. Select camera control (tethering icon)
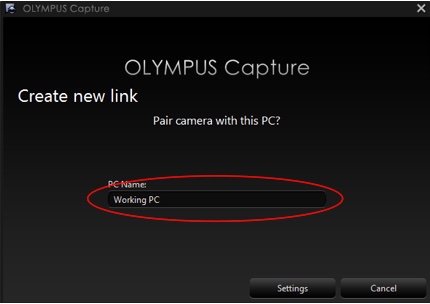
3 Select your computer name in the dialogue popping up.
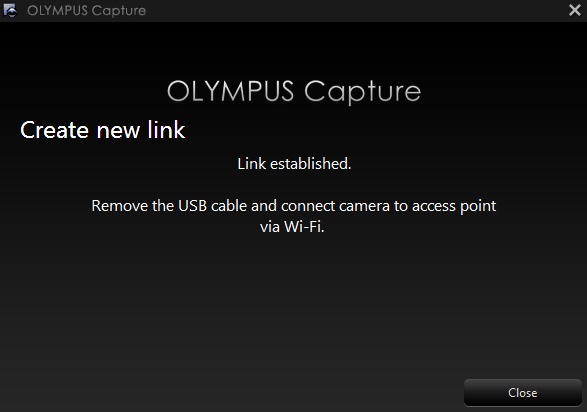
4 Once the link is established you can disconnect the cable and start shooting with the camera.
In case you would like to reconnect your camera with the computer. Press WiFi Icon on camera and select “Access Point Connection”. Select then the network, which is used by your computer as well.
Differences to tethered shooting with cable
There are essential differences between shooting to your computer tethered with a cable or via WiFi. The most obvious is that in case you are using a cable you can adjust any setting on the camera and with the computer, whereas with WiFi the camera is in your hands and operation is only on the camera. For the same reason with the WiFi connection, you get no live view on the computer screen. WiFi is only transferring the image directly to the hard disk on a selected folder.
Sadly, this doesn’t work on my Win 11 desktop and with OM-1. Although the PC and the camera are in the same network /same access point), I always get a message “This application is unable to find the camera in the PC mode” in OM Capture
Hi Seppo,
you should contact the OMDS support and ask whether they know a solution. Unfortunately I don’t have a Windows computer to check from my side.
Hi , you can’t just be in the same network. You have to create /start a network sharing. For Example i connect my OM-1 to the Access-point created on my laptop ( it meen you need to have a wifi card/ adapter) by the way the 5 GHZ dosen’t work…
Hope it helped
Hi Nolan,
thanks for your comment. You can include the OM-1 into your existing WLAN and and shoot directly onto your computer, this is no issue at all. Why do you think that you need to have an own network? As OM-1 is only supporting WiFi 4 it is obvious that only 2.4 GHz networks are supported.
Seems OM Connect is does not support OM-5 (or the other way around). Hence only way to transfer images is by using a USB cable. I hope there will be a SW update soon to make WIFI connection between OM-5 and PC (MAC) possible.
Hi Ton,
yes this is correct. OM System only support the high level cameras. I would not expect that this will change for the OM-5
Hi,
The steps you have outlined are easy enough to follow, and I have set this up supposedly. The camera connects to my network on which the PC is also connected, however the images are not going the workspace?
Ok…sorry, I realize you have to have both Capture and workspace running..:/ so it’s working now…thanks
Marty
Hi Marty,
happy that you managed to make it work. Enjoy using it.