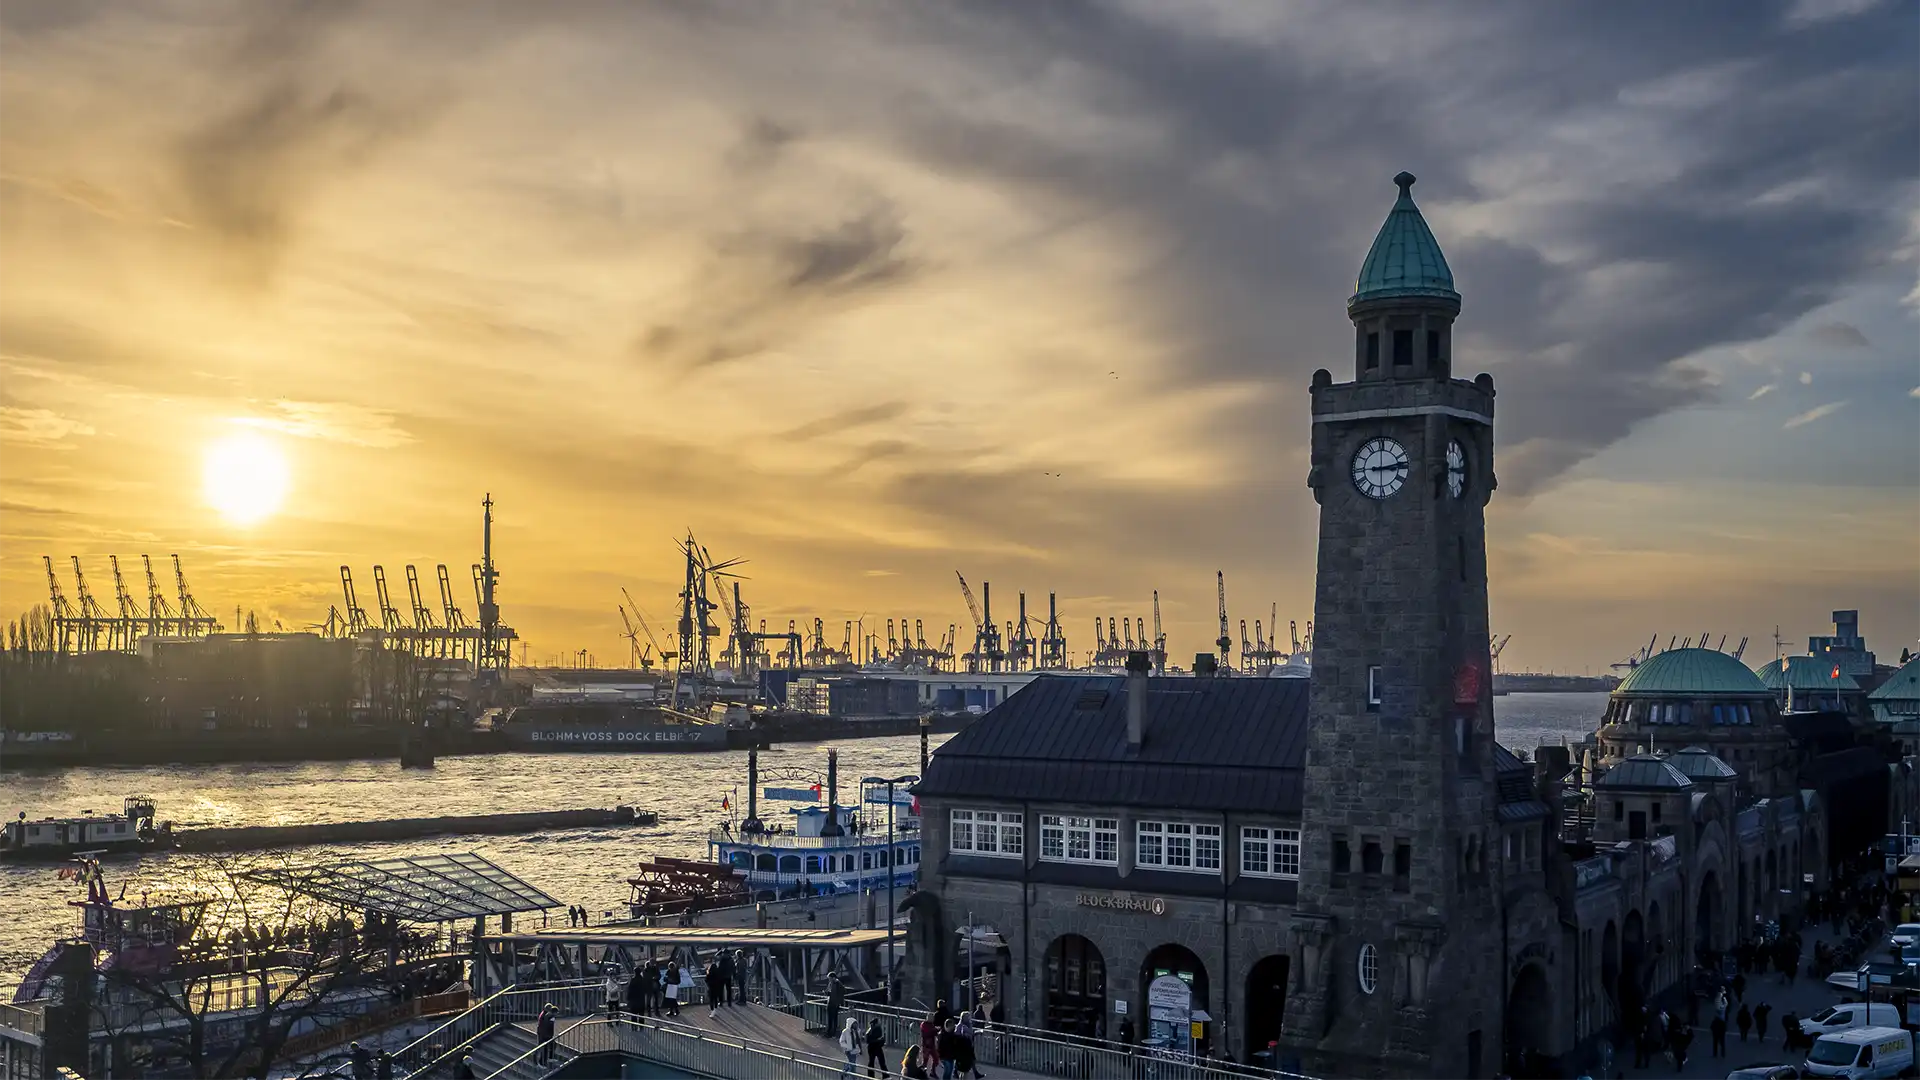
The automatic ISO sensitivity is an efficient function. The camera decides when it makes sense to switch to a higher sensitivity. If you are not active, this decision is based on the focal length of the lens used. The classic rule of thumb is that the exposure time should correspond to 1/ 2x the focal length. If I use a 75mm lens, I switch to a higher sensitivity when the exposure time is longer than 1/150 sec. By the way, this statement only applies in P and A mode. In S mode, the camera will switch to the next higher sensitivity when the exposure time at open aperture is no longer feasible. In M mode, the sensitivity changes constantly to maintain the set time/aperture combination without overexposing or underexposing the image.
Why should I adjust the automatic ISO sensitivity?
There are several reasons to adopt this behaviour. On the one hand, the OM System cameras have excellent image stabilisation. Therefore it is possible to realise longer exposure times than the rule of thumb without a tripod. On the other hand, it may be that you are working with a tripod and it is often better to allow longer exposure times instead of switching to the next higher sensitivity.
However, there is also the opposite direction. Maybe you have a lot of problems shooting freehand and therefore want to work with even shorter exposure times than the manufacturer’s setting.
There is also a camera-dependent maximum ISO sensitivity value up to which the camera automatically switches. This upper limit is somewhat dependent on your perception. For example, if you feel that the preset upper value is too noisy, you can adjust it downwards.
How can I change the behaviour?
The setting is located in a different place on each OM System camera. If in doubt, check the operating instructions. I describe it here using the OM-1 as an example. The corresponding setting is also found in all current OM system cameras.

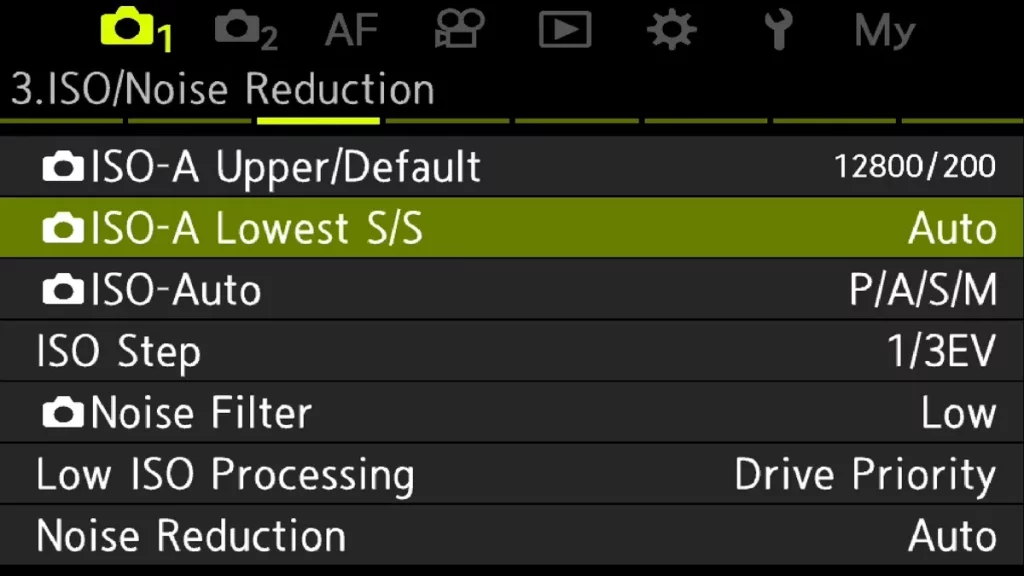
The settings for the automatic ISO sensitivity can be found directly in the 3 tab of the camera menu 1. As you can see in the picture above, there are three possibilities to influence the behavior of the automatic ISO sensitivity.
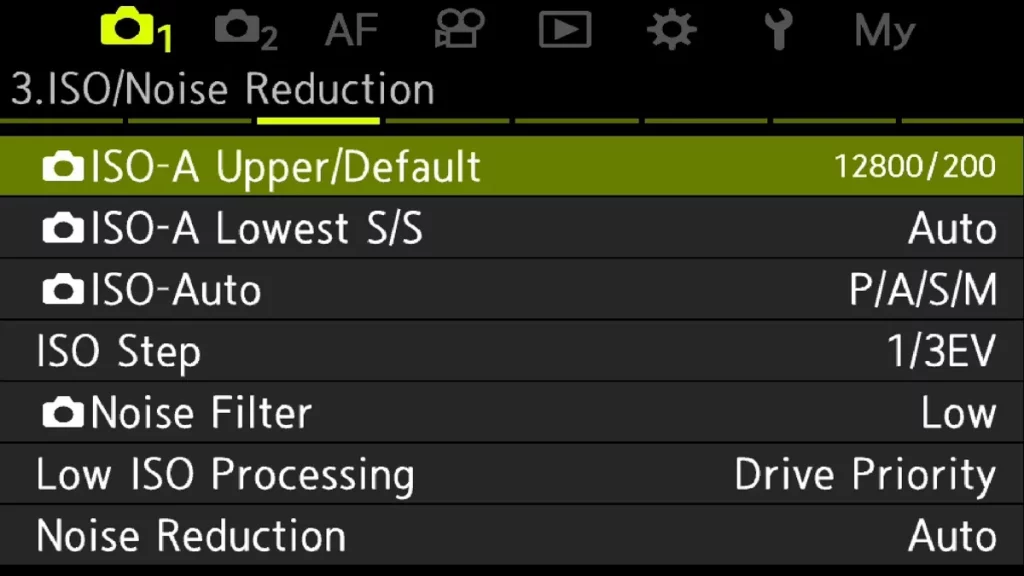
With “ISO-A Max./Std.”, you can define the maximum ISO to allow and the value you want the default value.
With “ISO-A Min S/S,” you can determine the exposure time the camera should switch to the next sensitivity level. If this setting is set to “Auto,” the values as written above are used.
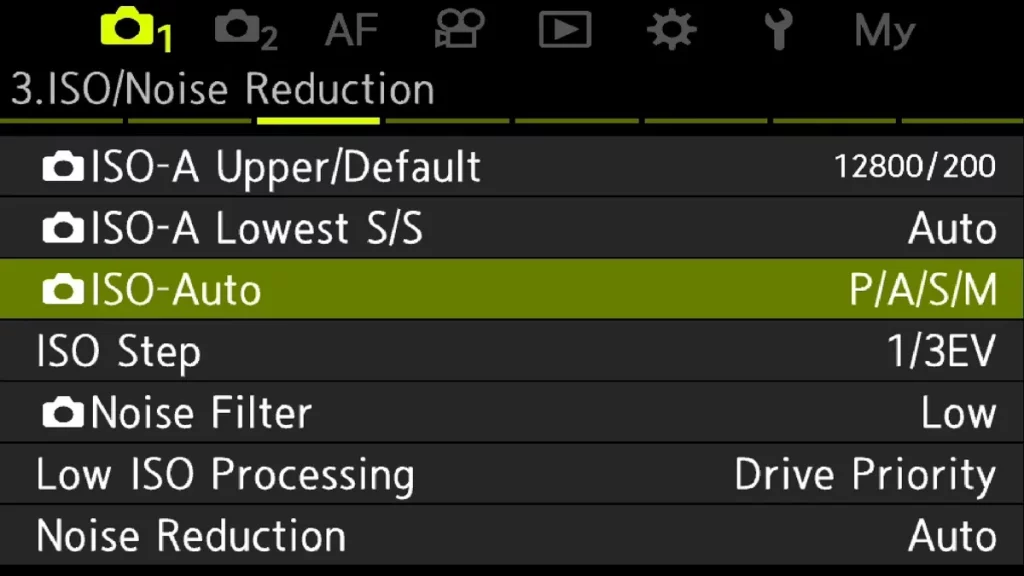
With “ISO-Auto,” you can determine which modes the camera should automatically adjust the ISO sensitivity. Here, you can also determine whether the automatic ISO sensitivity should be active in M mode.
Limits of the automatic ISO sensitivity settings
Unfortunately, the settings are limited, and you don’t have all the options. For example, the shortest exposure time to be set is 1/250 sec. They apply to all modes in which you use the automatic ISO sensitivity. Both settings are not relevant. Changing them only makes sense if you want to use a longer exposure time than the default. It matters for the long focal lengths, like the M.Zuiko Digital ED 150-400mm F4.5 IS TC1.2 PRO or the M.Zuiko Digital ED 300 F4.0 PRO.
If you want to read more tips on how to set up your camera, you can find them in my “Camera Secrets” section. I am also happy to receive comments or suggestions on topics that interest you.
Pingback: OM-1 automatic sensitivity setting