This is the fourth part of my AF guide for the OM-1. The first three parts were about “Autofocus basics,” “Autofocus customizations,” and the “Differences between C-AF and C-AF + TR.” In this part, I would like to show you how you can help the camera to focus even faster. When it comes to AF performance, many photographers forget that the distance from close focus to infinity can be very long with many lenses. This applies to long focal lengths such as the M.Zuiko Digital ED 150-400mm. Many of these lenses, therefore, have a switch to activate the AF limiter and the range in which the camera focuses. The “Total”, “Near” or “Far” ranges are usually available here. As the camera then only searches for the focus in these areas, this is an aid to significantly improve the AF performance of a system.
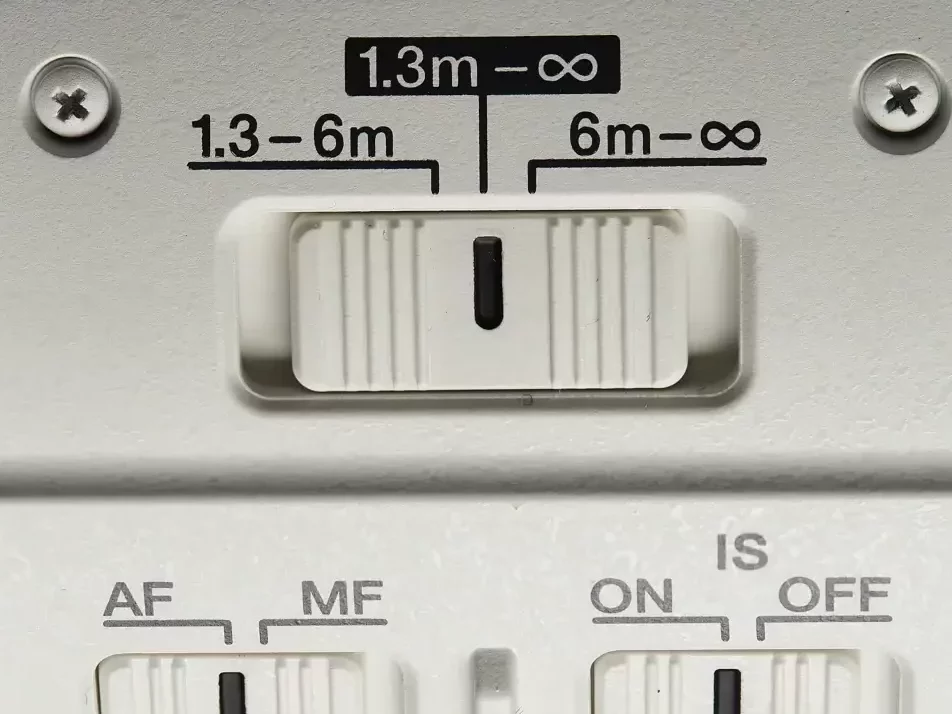
With OM System lenses, in addition to the three longest focal lengths (M.Zuiko Digital 150-400mm, M.Zuiko Digital 100-400mm and M.Zuiko Digital 300mm), the two higher quality macro lenses also have such a limitation.
Digital setting of the AF limiter
With the OM-1, you can set an AF limitation via the software. This can then be used with all lenses. You can also save up to three presets and call them anytime. The best way to do this is described below.
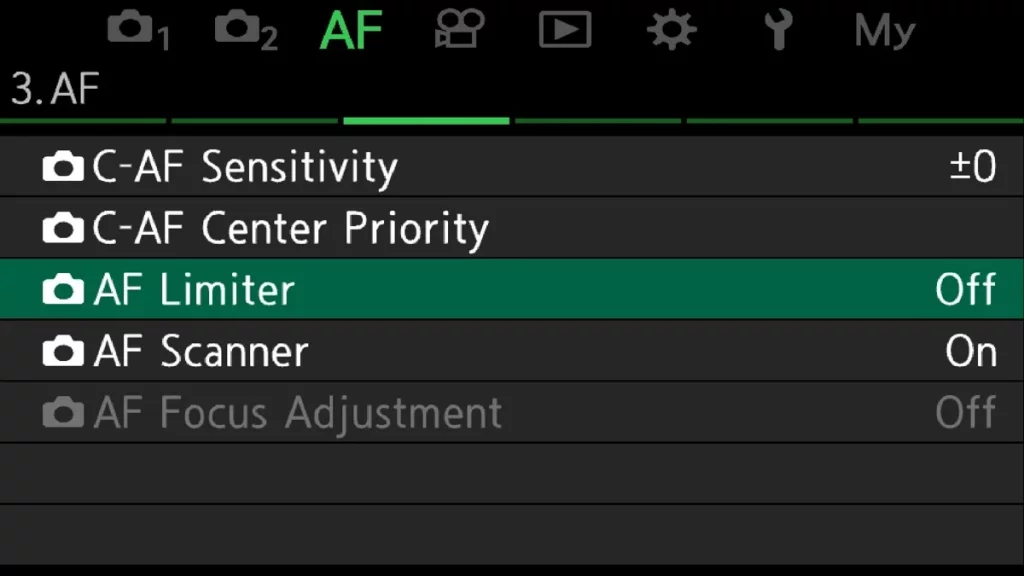
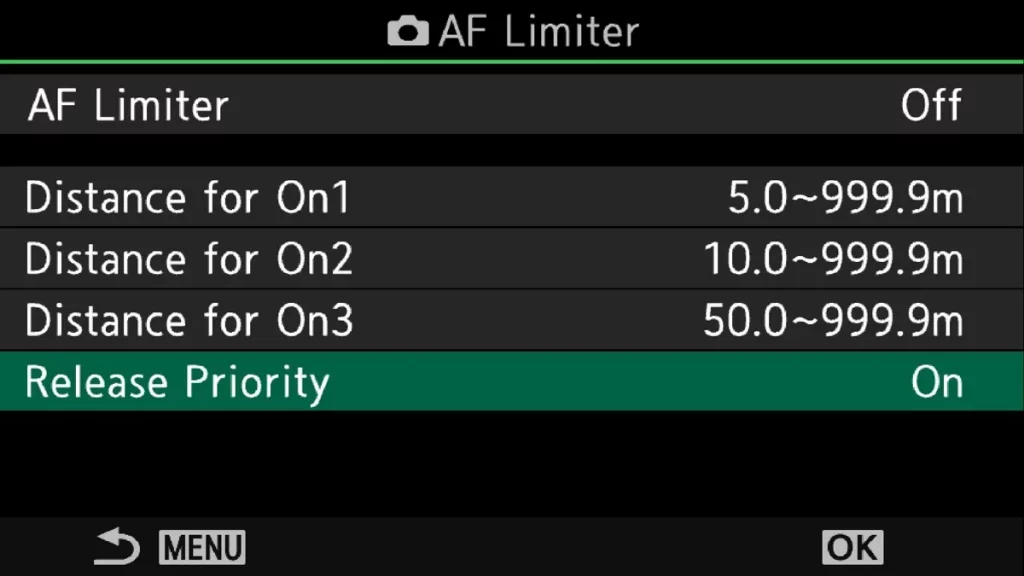
1 The settings for the AF limitation can be found in the AF menu under 3. AF. You can make three basic settings here
2 select one of the three presets and confirm with the “OK” button to make the basic settings.
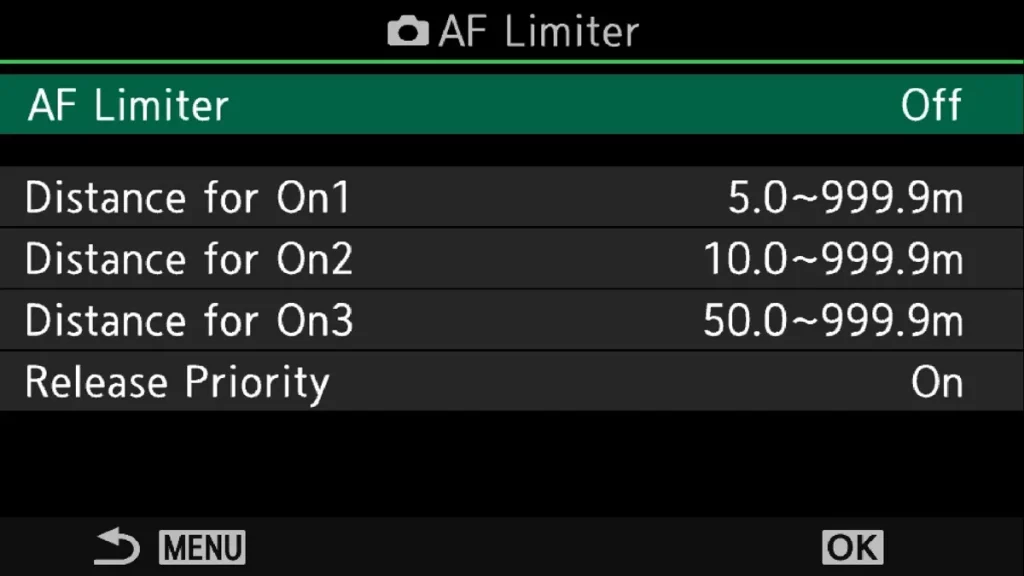
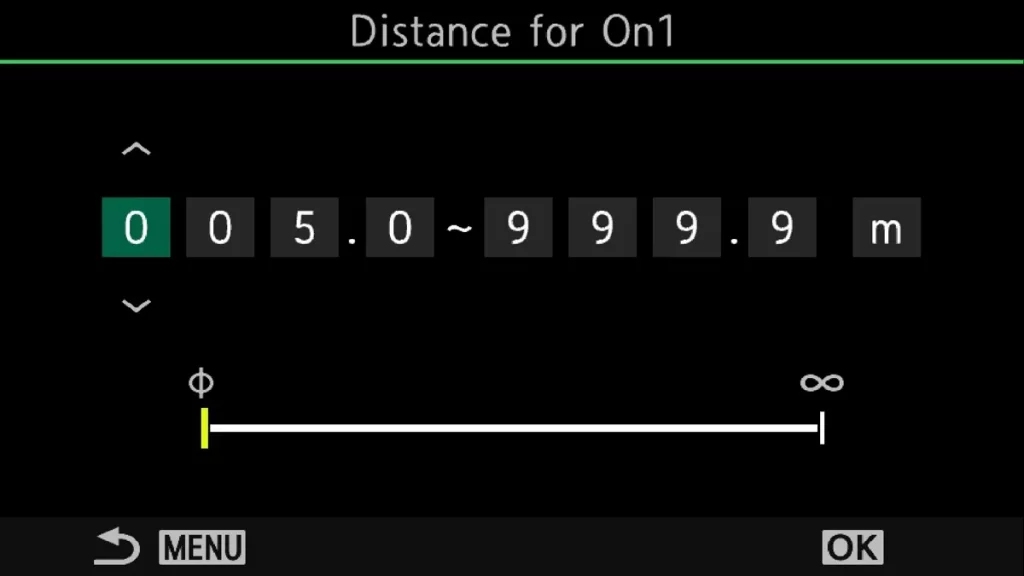
3. Use the cross keys to select both the digits and the values. As soon as the start and end values* have been set, confirm the values with the “OK” button.
* The values are rough and are not exact. You can, therefore, ignore the decimal places.
To call up the AF limitation and change the corresponding basic setting, you could now return here or make the setting accessible via the “My Menu.” However, both are quite time-consuming and are not fast enough if the worst comes to the worst. It, therefore, makes more sense to program a button to have direct access to it. I use the L-Fn button on the Pro lenses for this. If you are not using Pro lenses, you can also assign the function to a button of your choice.
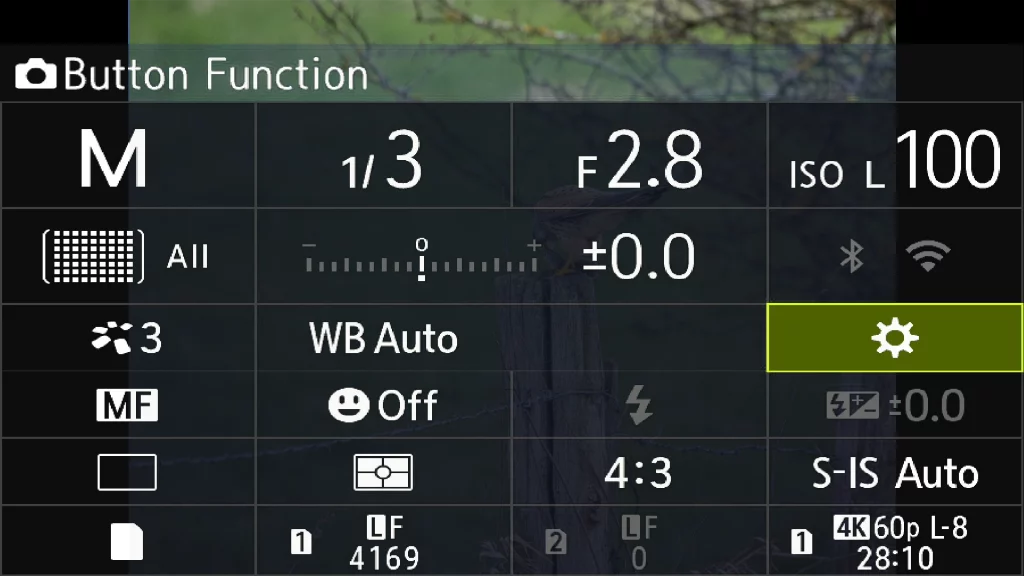
4 The quickest way to access the button settings is via the Super Control Panel. Simply press the “OK” button and select the cogwheel at the bottom left.
5 You will be taken directly to the programming of the function buttons. Select the button that suits you best and select the AF limit as the function.
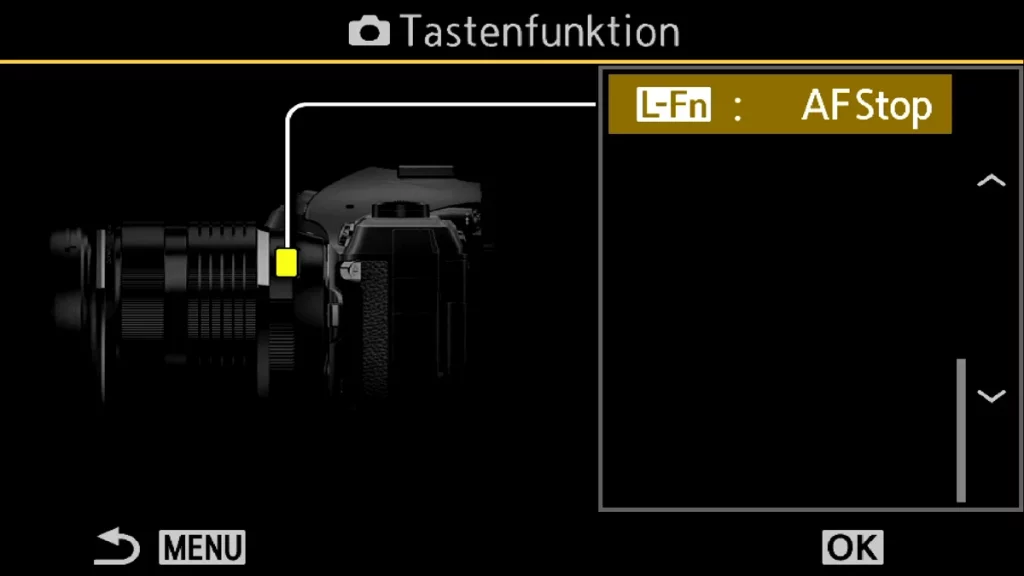
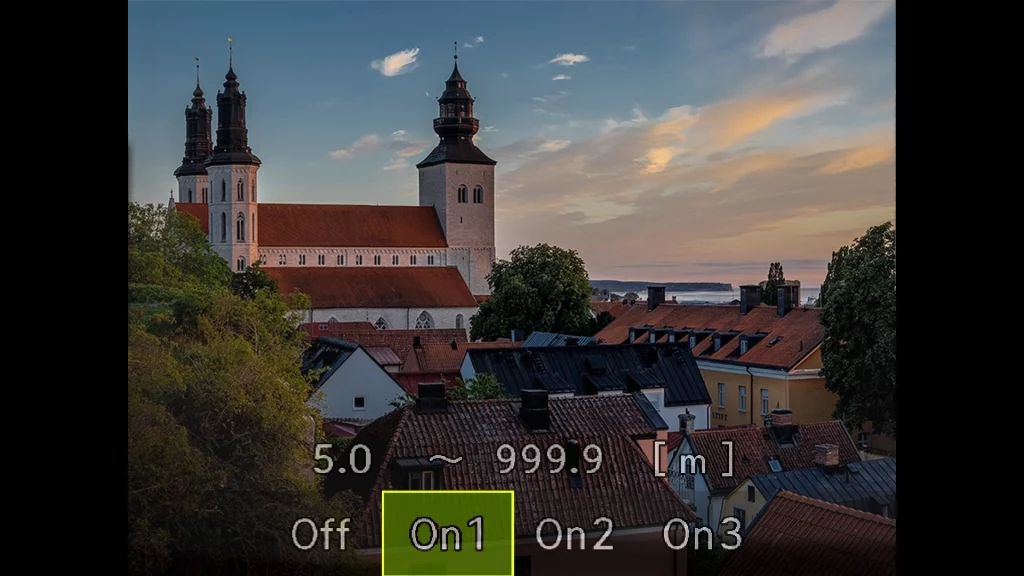
6 You can switch the focus limitation on or off by pressing the function button. To switch between the settings, press and hold the function button. This opens the submenu, which allows you to switch between settings.
Three more important notes on this function.
As this is a software version of the function, it is not quite as precise and is somewhat slower than the version on the lens.
If you activate the function via the menu or a button, “AF Limit” is displayed in green in Live View when the function is activated.
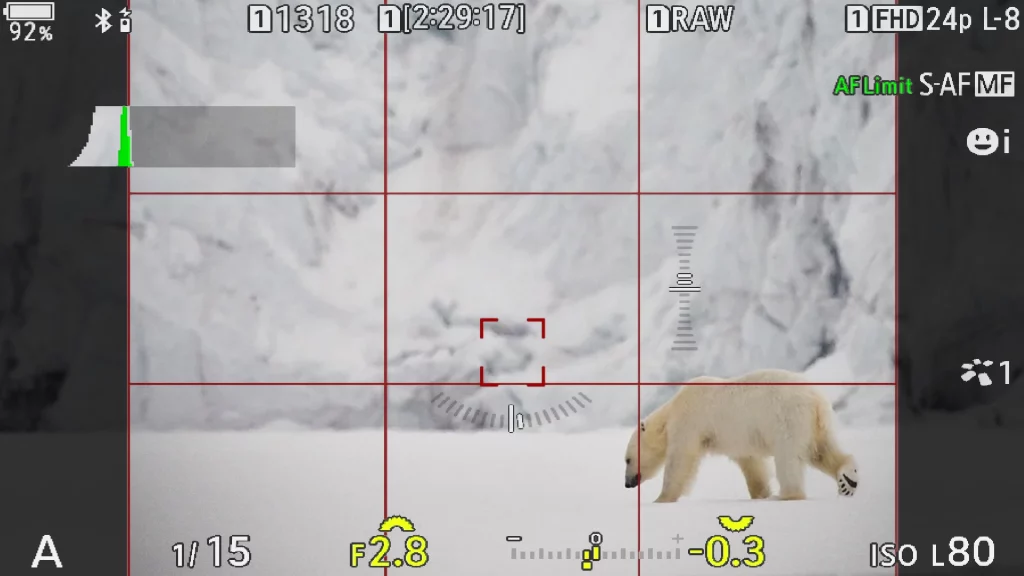
As the function is slower, you can decide whether you want to have shutter priority. If you have selected shutter priority, the camera will also take a picture if you are outside the set range.
In the next part, I will discuss “OM-1 Spot metering AF fields combine.” This function allows you to control the exposure better.


