

OM-D cameras do have a predefined self-timer of 2 or 12 sec. In most cases, this is more than enough, but in some situations, you might like to adjust the shutter release delay by yourself. Therefore OM-D cameras offer the possibility to adjust self-timer to your needs.
How to adjust self-timer

1 press the “OK” button to activate the Super Control Panel. Choose self-timer in shooting mode (the self-timer symbol with C).
2 Press again “OK” button to be able to adjust your self-timer.
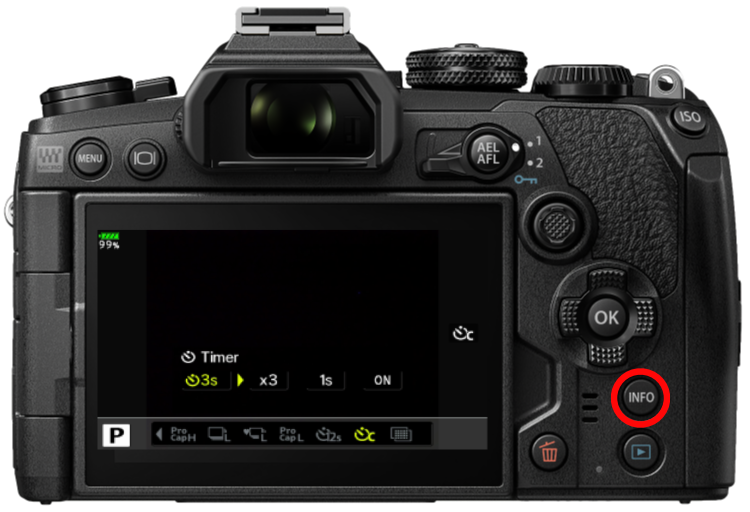
3 To change the settings press the “Info” button.
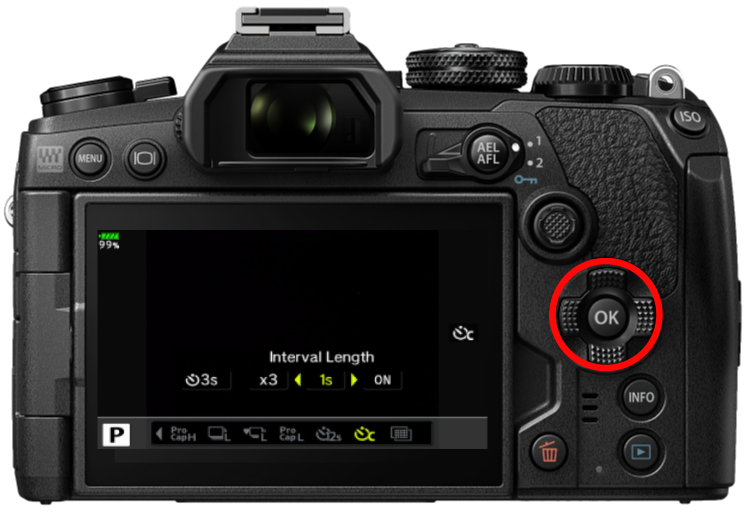
4 Choose the settings you would like to adjust with left / right cursor buttons. Adjust them with the up / down cursor buttons to your needs.
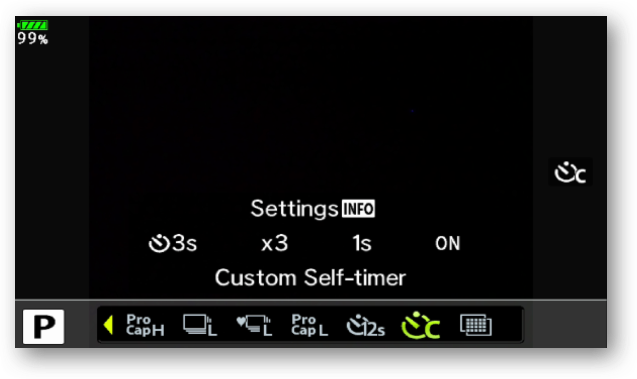
The following parameter could be adjusted:
1. Delay until the first image.
2. Number of total images.
3. Delay between single images.
4. Whether the camera should focus on each image or not.