

Have you always wanted to generate social media posts at scale and publish them automatically on social networks? If you have a concept that is easy to replicate, it’s easier than you think. I created content for my Instagram channel in 15 minutes or less for more than a month. My concept is as follows. In addition to the actual image, I want to display another image with the metadata in the carousel. Doing this manually would be a long and tedious task. Reading the EXIF data for each image and then entering it by hand would take at least 5 minutes per image. However, the following workflow makes it much faster.

Create basic structure
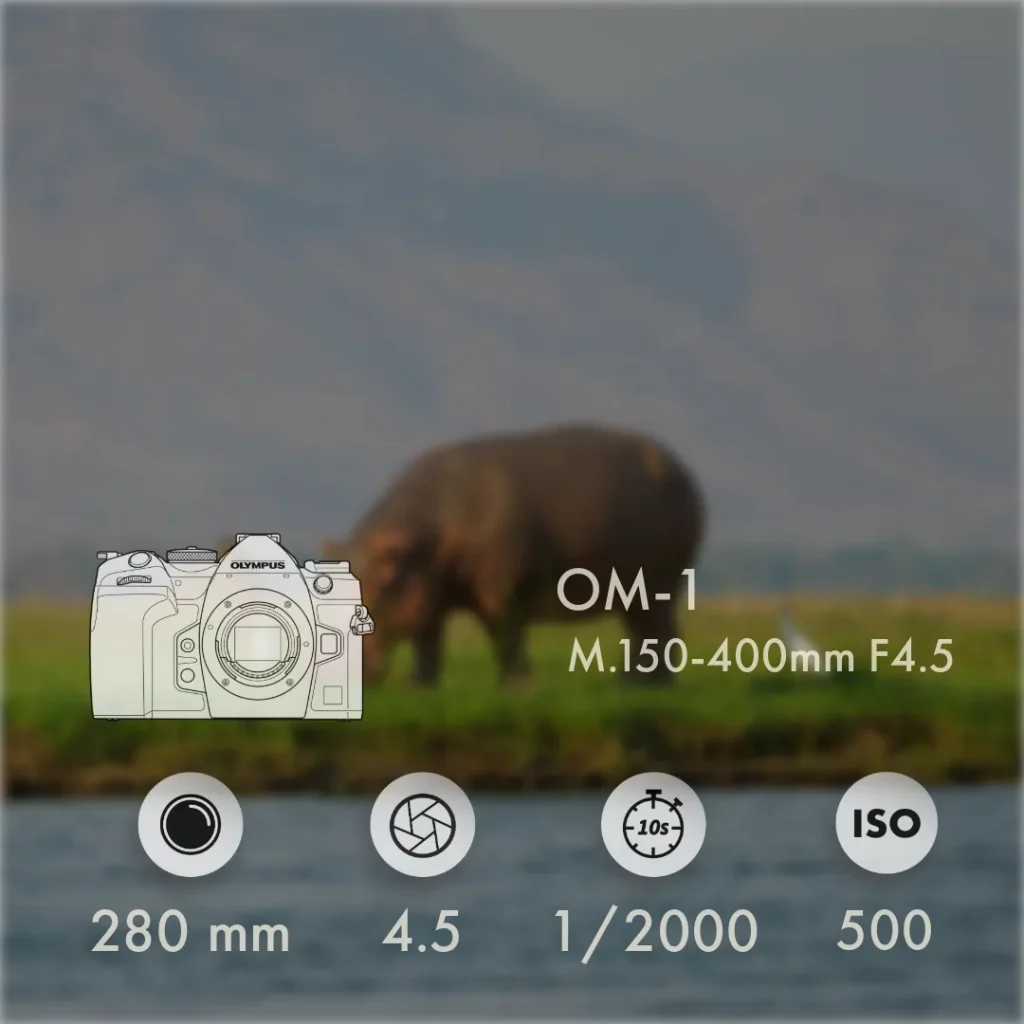
Before we start with automation, we need to create a file with the desired structure. I work with Adobe Express because I am very familiar with the programme from my work as a product manager at Adobe. I decided to show the image once as the result and once slightly blurred and darkened, with the corresponding settings. Once you have set the settings, you need a CSV file containing the information you want to display in the images. In my case, these are the settings used, the camera, and the lens. All this information is stored in the EXIF data of your images. So all you have to do is get the information easily and without much effort. For me, the easiest way to do this is with Phil Harvey’s freely available EXIF tool. It supports all known image formats, including the RAW files from my OM-1.
Extract EXIF data
Once you have installed the programme on your computer, you can automatically save the EXIF information from all images in a folder in a table. To do this, you need to open the terminal. Once you have opened the terminal, navigate to the folder where you saved the images. If you are not familiar with terminal commands, you can find basic ones at Heise. Once you are in the image folder, you can enter the following command for the EXIF tool.
exiftool -r -csv \
-FileName -Model -LensModel -FocalLength -ExposureTime -FNumber -ISO \
. > selected-metadaten.csv
As soon as you press Enter to confirm, the EXIF tool searches the folder for images and creates a CSV file with columns for file name, camera model, focal length, exposure time, aperture, and sensitivity. It should then look something like this.
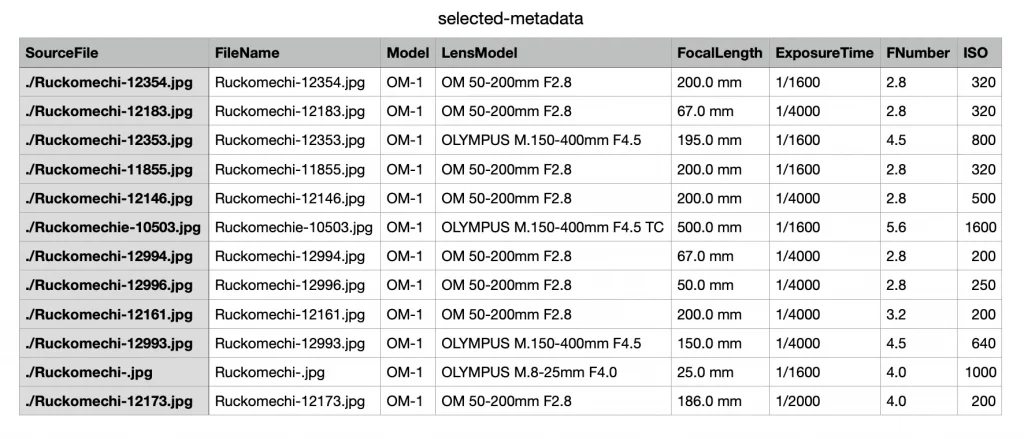
You can use this table in the next step for automation. Please note that the transferred data looks exactly as it does in the table. If you want a different format, you will need to edit the table accordingly. For example, I deleted the decimal places for the focal lengths.
Insert EXIF data automatically
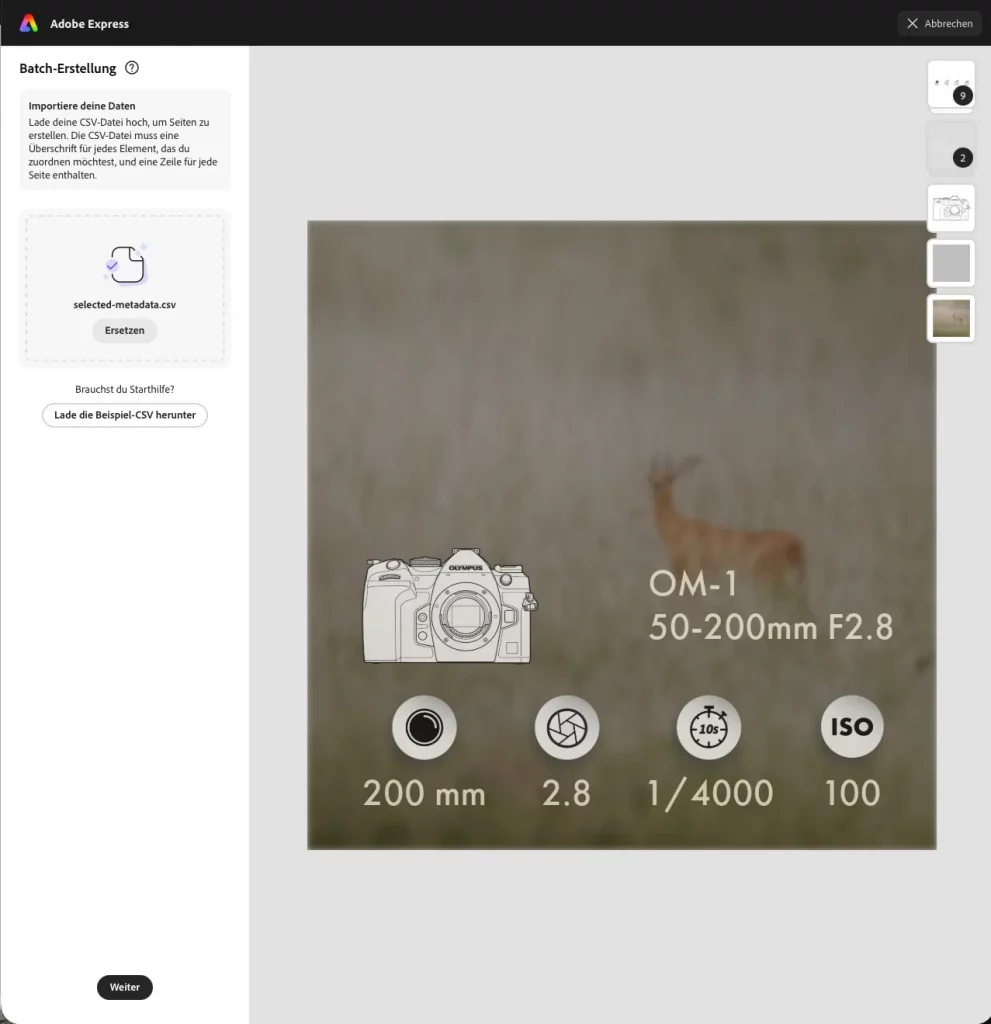
1 First, you need to open the prepared file and then open “Edit page”. A menu will open on the left-hand side, where you will find the “Batch creation” option. This will start the entire process. Upload the CSV file you created and click “Continue”.
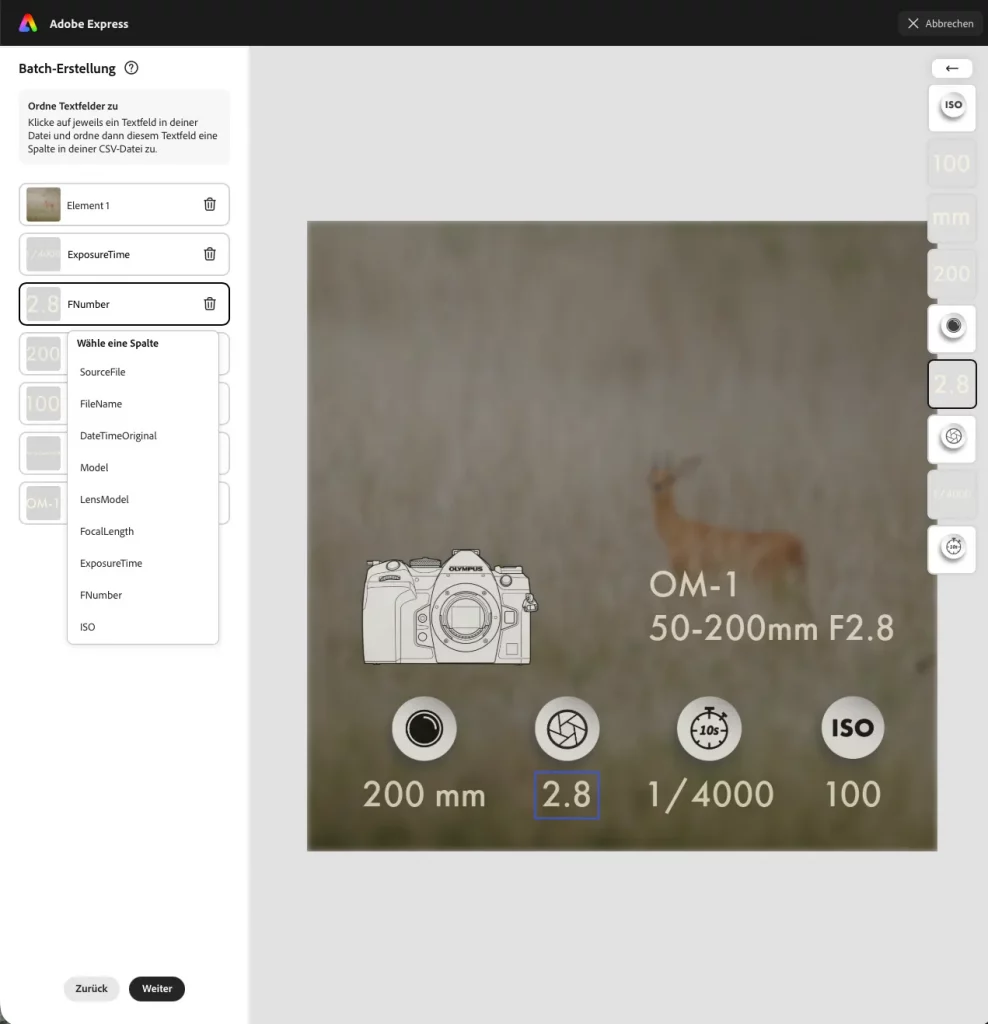
2 All you have to do now is link the entries in the table to the corresponding information on the image. To do this, click on the relevant text or image and select the appropriate column in the table on the left-hand side. Once you have assigned all the fields, click on Continue again. Express will then create the corresponding copies and insert the EXIF data.
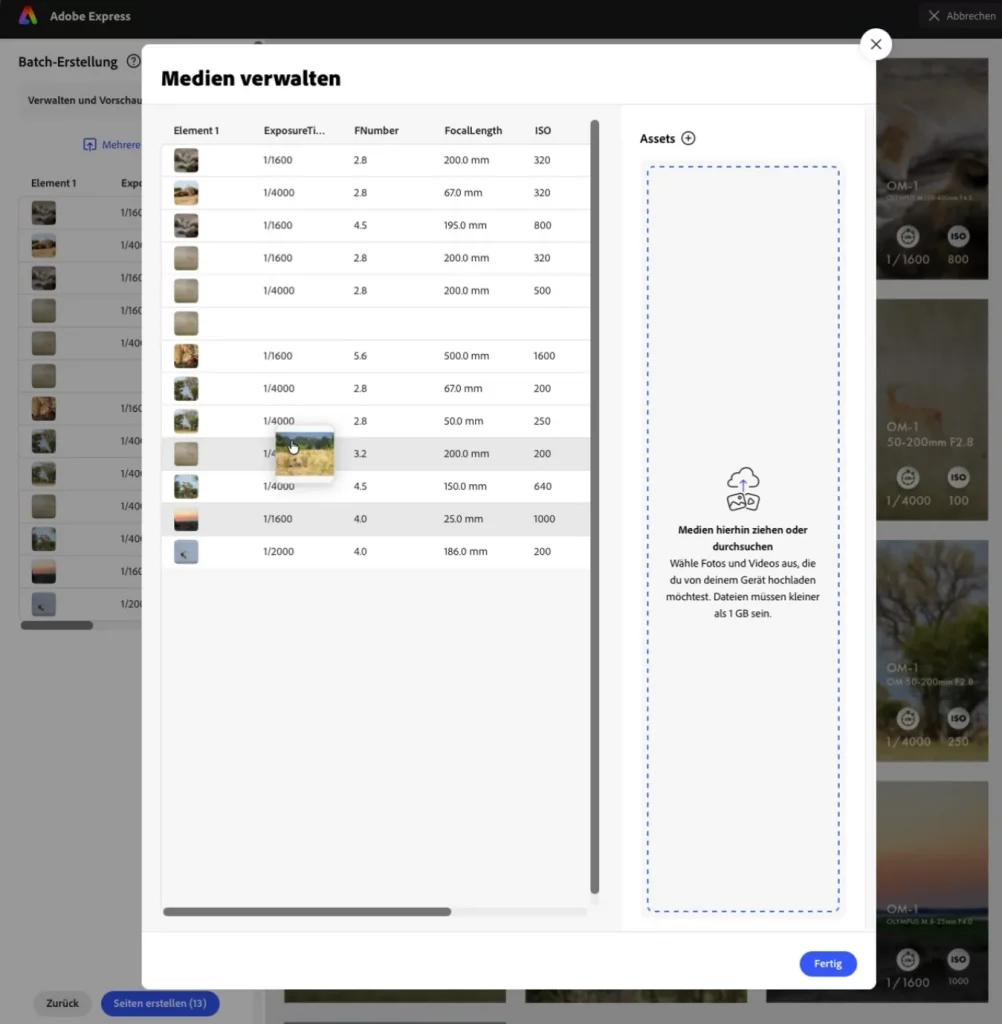
3 The final step is to assign the appropriate images. To do this, click on “Add multiple assets”. A field will open where you can upload the images from your folder. The images can then be easily assigned to the correct metadata using drag-and-drop.
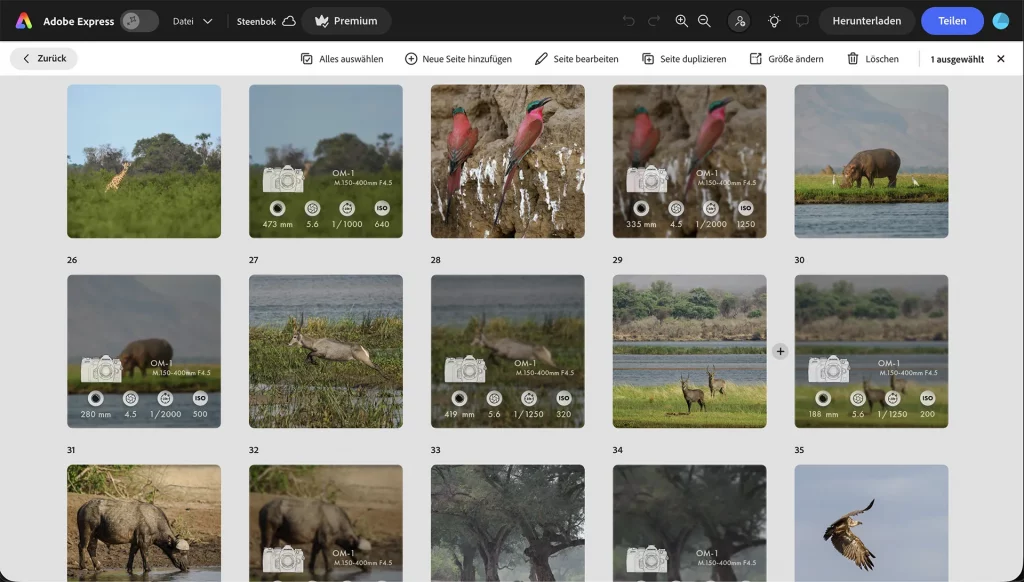
Once the files have been correctly assigned, you can create the individual pages by clicking on “Create pages”. This allows you to achieve such a result quickly and easily.
Automated publishing on social networks
As a final step, you can publish the results automatically on social media using either Meta Business Suite or Adobe Express. In Adobe Express, proceed as follows.
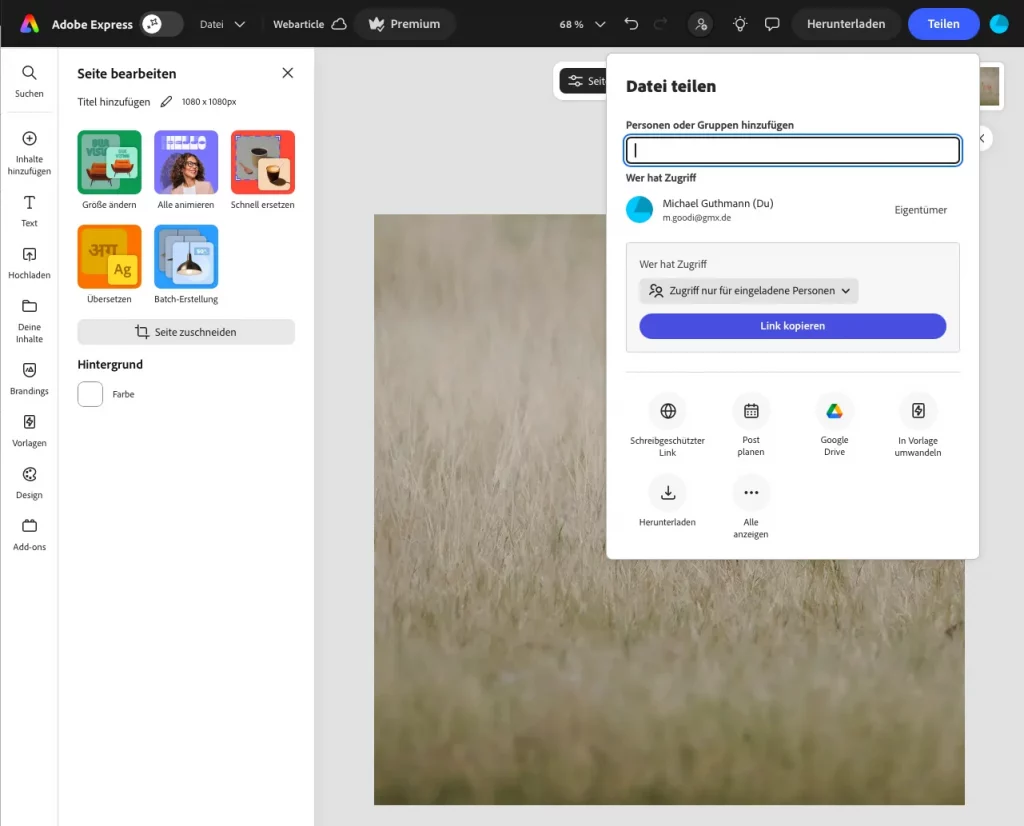
1 Select the image or images you want to publish and press “Share”. Here you will find an entry called “Schedule post”.
2 If you select this option, you will be taken to a calendar where you can easily schedule when the image should be published for each channel.
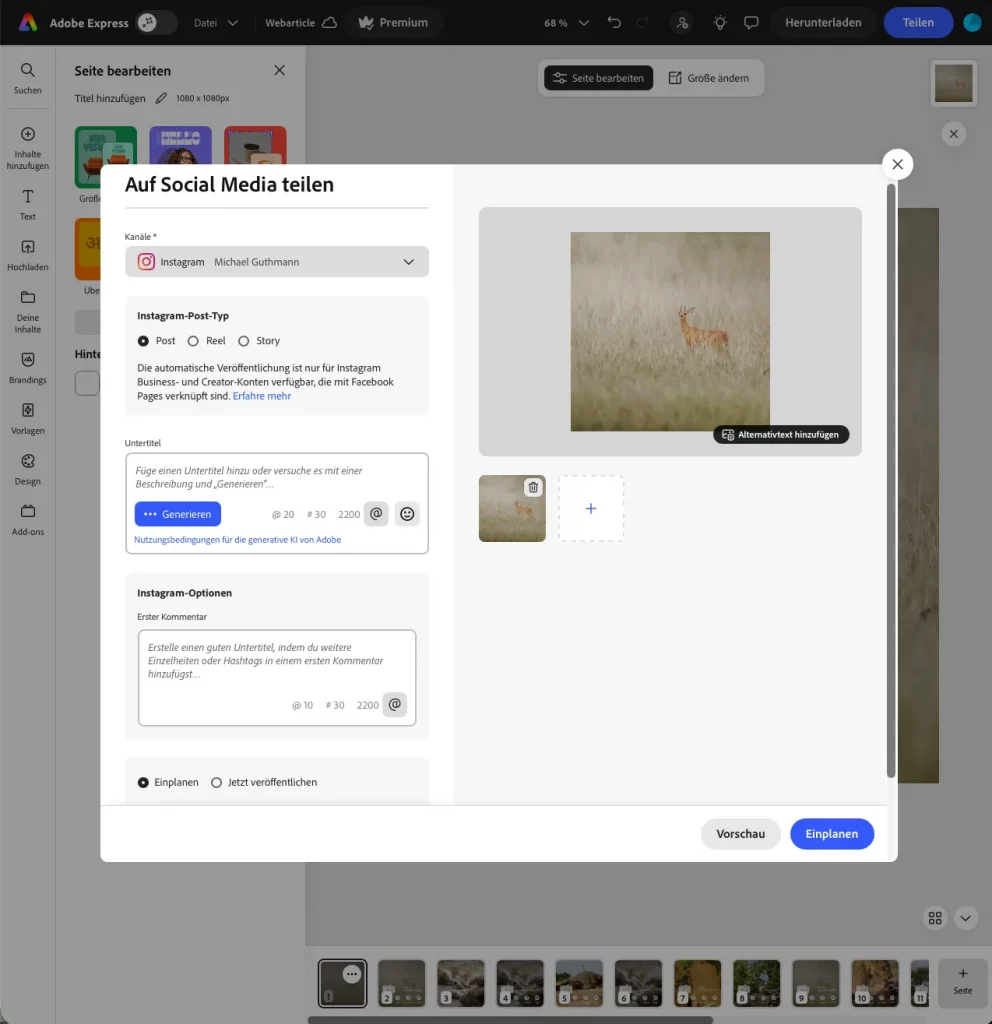
Please note that automated publishing in Adobe Express is available only with a business or creator account; it does not work with a standard account.
Fazit
I would like to point out once again that I work as a product manager for Adobe Express, which is why I used this software as an example. There are other software programmes with similar functions that achieve the same results. I wrote this article purely out of personal interest in my spare time and was not paid by Adobe to do so. Let me know in the comments how you share your images on social media and which software you use.